 James Okafor
All Gold Skulltula locations in Zelda Ocarina of Time
Every Gold Skulltula Token in Ocarina of Time, and where to find it.
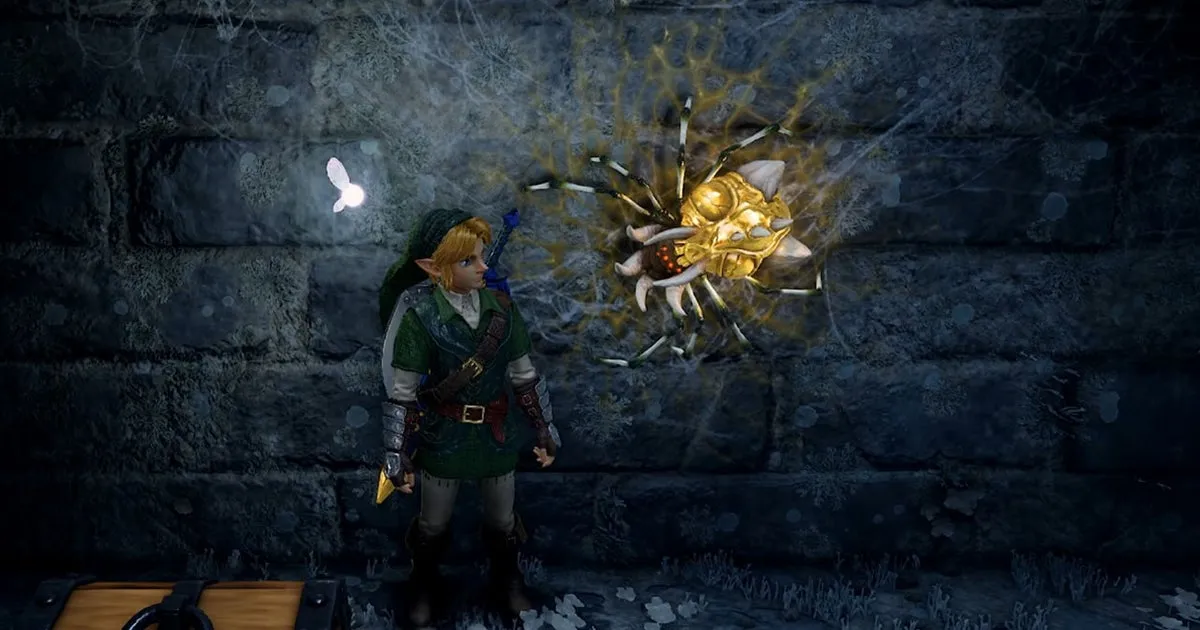
Gold Skulltulas are cursed spiders with golden backs, and they're scattered all over Hyrule in The Legend of Zelda: Ocarina of Time. Cursed is the right word: these creatures are bound up with the Cursed Rich Family stuck inside the House of Skulltula in Kakariko Village. They were greedy once, and now they're having a thoroughly miserable time of it. Collect enough Gold Skulltula Tokens and the family will pay you back with a reward, so here's a look at every Gold Skulltula location in Ocarina of Time.
On this page:
Hey! Look! Listen! Our Ocarina of Time walkthrough has more help if you need it.
All Gold Skulltula locations in Zelda Ocarina of Time
Ocarina of Time hides 100 Gold Skulltulas across its world. You'll find them in dungeons, behind buildings, up trees and in plenty of other odd spots. Some only show up at night, and others need a specific item before you can reach them. A handful can only be grabbed with the Scarecrow's Song.
A Gold Skulltula makes a noise when you're near one, so let your ears lead you. In the Switch 2 Remake you may also notice a spider web or a golden glow in a tree. And don't forget to stop by the House of Skulltula in Kakariko Village to claim your rewards.
To make this easier, I've put every Gold Skulltula location in the order I take them on a 100% run of Ocarina of Time. A few of these spots mean some backtracking, and if you've played before you probably have your own route already.
Great Deku Tree - Compass Room
- Child timeline
Odds are your first Gold Skulltula is the one in the Great Deku Tree's Compass room. An alcove sits on the left side of the room, with a Big Skulltula standing guard. Kill it, hop across the platforms to the alcove, then take out the Gold Skulltula behind the chest.
Great Deku Tree - Vines
- Child timeline
Once you drop through the giant spiderweb, look for a Gold Skulltula on the vines that lead up from the water.
Great Deku Tree - Gate
- Child timeline
In the same room as the one above, another Gold Skulltula sits on the water gate. Reach it with a jump attack from the ledge, or use the Boomerang.
Great Deku Tree - Burn Spiderweb
- Child timeline
You'll find this one in the last room of B1 you visit before heading back to the main room, the one with the Gohma Larva. Light a Deku Stick and burn the web opposite the one blocking the tunnel. That leads you to a Deku Baba and then a Big Skulltula. Kill both, then take out the golden spider and climb the vines to its token.
Kokiri Forest - Know-It-All
- Child timeline
- Night only
At night, check the back of the Know-It-All Brothers' house.
Hyrule Castle Town - Guardhouse
- Child timeline
Hidden in a crate inside Hyrule Castle Town's Guardhouse. In the Switch 2 remake, this crate shakes, and so do the others like it.
Hyrule Castle - Tree
- Child timeline
Walk through the gardens outside Hyrule Castle. Before you climb the vines that lead to the platform above the moat, turn into the small garden on the right and roll into the tree to shake out the Gold Skulltula. In the original game, this tree stands on the road to Hyrule Castle.
Lon Lon Ranch - Tree
- Child and Adult timeline
Roll into the tree behind the house at Lon Lon Ranch.
Kokiri Forest - Soft Soil
- Child timeline
- Bottle of Bugs required
To get bugs, pick up a small rock, throw it, then scoop the bugs into an empty bottle. Empty the bottle over the soft soil by the shop and a Gold Skulltula appears. This works on every patch of soft soil, even one where you've already planted a Magic Bean.
Lost Woods - Soft Soil (1)
- Child timeline
- Bottle of Bugs required
The Lost Woods has two patches of soft soil. The first is in the area with the bridge linking Hyrule Field to the Lost Woods. You can't jump the bridge, so take the left path when you enter the Lost Woods and the dirt is close by. Drop some bugs in it.
Lost Woods - Soft Soil (2)
- Child timeline
- Bottle of Bugs required
The second patch is in the area with two Business Scrubs. From the Lost Woods / Kokiri Forest entrance, go right, left, right, left, then left again.
Kakariko Village - Tree
- Child timeline
Roll into the tree just beyond the village entrance gate.
Kakariko Village - Near Guard
- Child timeline
- Night only
Walk up to where the Death Mountain guard stands in Kakariko Village, then look behind the building across from him.
Kakariko Village - Watchtower
- Child timeline
- Night only
On the watchtower ladder.
Kakariko Village - Construction Site
- Child timeline
- Night only
Check the bricks in the middle of the construction site, across from the cucco pen.
Kakariko Village - House of Skulltula
- Child timeline
- Night only
One Gold Skulltula clings to the wall of the House of Skulltula. It's practically taunting the family trapped inside.
Kakariko Graveyard - Soft Soil
- Child timeline
- Bottle of Bugs required
Empty a bottle of bugs onto the soft soil in the graveyard.
Death Mountain Trail - Soft Soil
- Child timeline
- Bottle of Bugs required
Catch more bugs and tip them onto the patch of soil just outside the Dodongo Cavern entrance.
Dodongo Cavern - Near Dodongo Larva Room
- Child and Adult timeline
First, get to the narrow corridor-like room where Dodongo Larva attack you, reached from the main hall. A breakable wall on the right side gives way to a Bomb, or you can lure a Dodongo Larva into exploding next to it. Head into the room behind the wall, kill the Keese, then grab your Gold Skulltula.
Dodongo Cavern - Stairway Room
- Child and Adult timeline
One Gold Skulltula waits in the room with the stairway you build from Bomb Flowers. It's on the climbing wire (vines in the original) at the top of the room, near the door to the second floor. Kill it, then climb up to the token.
The original game puts a second Gold Skulltula in this room, but the Switch 2 Remake moves it somewhere else.
Dodongo Cavern - Main Room, 2F Top-Right Corner
- Child and Adult timeline
- Bombs required
On the right side of the 2F bridge over the giant skull, there's a bombable wall. The Gold Skulltula is on the back of the rock spike in the middle of the room beyond it. Deal with the two Dodongos first, though.
Dodongo Cavern - Before Boss Room
- Child and Adult timeline
After you clear the skull route and arrive in the last room before the boss, look for a wall you can blow open in the chamber where you shove a block around. Bomb it, step through the new doorway, and take out the Armos before you grab the next Gold Skulltula. In the Switch 2 remake, this room also holds Dodongo Larva.
Death Mountain Trail - Bombable Wall
- Child and Adult timeline
- Night only
- Bombs required
A wall on the cliff near the Kakariko Village entrance can be bombed. Blow it open to claim a Gold Skulltula.
Goron City - Rock Room
- Child timeline
- Bombs required
Take the top floor of Goron City to its left side and you'll come across a room full of coloured rocks. Bomb the pale ones and work your way toward the back, where a crate waits. Roll into it to release a Gold Skulltula.
Death Mountain Crater - Top Level
- Child timeline
Come into the crater through the top entrance and keep going until two crates show up on your left. Roll into the one that's shaking. In the original, that crate sits right beside you as you enter.
Zora River - Soft Soil
- Child timeline
- Bottle of Bugs required
Empty a bottle of bugs into the soft soil next to the Bean Seller.
Zora River - Vines
- Child timeline
- Night only
Make for the waterfall on the way to Zora's Domain. Vines grow at the base of a rock there — run around behind it and the Gold Skulltula is yours.
Zora Fountain - Tree
- Child timeline
Roll into the tree beside the Gossip Stone.
Lake Hylia - Soft Soil
- Child timeline
- Bottle of Bugs required
A patch of soft soil sits outside the laboratory. Bring bugs and drop them in.
Lake Hylia - Far Tunnel
- Child timeline
- Night only
In the southwest corner of Lake Hylia there's a tiny strip of land. (And we do mean tiny.) A tunnel runs from it, with a Gold Skulltula waiting at the far end. Can't find the tunnel? Swim south along the edge of the grass on the lake's western side. Hug the wall and it'll turn up eventually.
Inside Jabu-Jabu's Belly - Water Raising Room
- Child timeline
Climb the vines in the water raising room and you'll find this spider stuck to the wall. In the original, it hangs on the vines in the same room.
Inside Jabu-Jabu's Belly - Pit Room (1)
- Child timeline
- Boomerang required
In the room where you first run into Princess Ruto, drop through the hole furthest north. Then look up.
Inside Jabu-Jabu's Belly - Pit Room (2)
- Child timeline
- Boomerang required
This one sits on the floor of the tunnel that leads to the Big Octo fight. In the original game it's right next to the Skulltula above.
Inside Jabu-Jabu's Belly - Near Boss Room
- Child timeline
- Boomerang required
Just before the boss, another Gold Skulltula clings to the vines on the tall pillar.
Zora Fountain - Wall
- Child timeline
- Night only
- Boomerang required
At night, climb onto the log in Zora Fountain and run along it. A Gold Skulltula is stuck to the wall across from you.
Lon Lon Ranch - House
- Child timeline
- Night only
- Boomerang required
Come nightfall, a Gold Skulltula shows up on the ranch house — specifically, on one of the upper-floor windows that face the barn. (Marlon should sleep a little easier.)
Lon Lon Ranch - Tower
- Child and Adult timeline
- Night only
- Boomerang if Child Link and Hookshot / Longshot if Adult Link required
Go to the tower where you picked up the Heart Piece. At night, a Gold Skulltula appears on the vines above the boxes.
Kakariko Graveyard - Wall Behind Dampé's House
- Child and Adult timeline
- Night only
- Boomerang or Hookshot / Longshot required
Time for a spooky night in the graveyard. Look behind Dampé's House after dark.
Lake Hylia - Lab Wall
- Child timeline
- Night only
- Boomerang required
At night, a Gold Skulltula appears on the lab wall that overlooks Lake Hylia.
Gerudo Valley - Beneath The Small Bridge
- Child timeline
- Night only
- Boomerang required
Near the Hyrule Field entrance, a plank crosses a small pool of water. At night in the remake, a Gold Skulltula waits beneath this bridge. In the original, it sits on top of the small waterfall.
Gerudo Valley - Soft Soil
- Child timeline
- Bottle of Bugs required
Use a cucco to get down to the ledge at the bottom of the gorge. There's a patch of soft soil near the Gerudo standing by a cow. Drop bugs into it.
Hyrule Field - Lone Tree
- Child and Adult timeline
Roll into the lone tree that stands between Kokiri Forest and Lon Lon Ranch.
Hyrule Field - Hole In Southern Wood
- Child and Adult timeline
- Bombs and either Boomerang or Hookshot / Longshot required
South of Lon Lon Ranch, behind the spot where the Peahat hovers, there's a hole in the wood. You'll need Bombs to open it. Inside, a Gold Skulltula hangs on the cobwebs overhead. Keep an eye out for the Big Skulltula.
Hyrule Field - Wetlands Grotto
- Child and Adult timeline
- Bombs and time travel required
A hole sits near a Peahat in the wetlands north of the Lake Hylia entrance in Hyrule Field. Bombs get you in, and you'll probably want to take care of the Peahat too.
Inside, you'll find a Skulltula and a fairy note explaining that this Skulltula stopped a fairy from catching a golden bug. Kill the Skulltula before you travel to the future as Adult Link.
Come back to the hole as Adult Link and you'll find a crate holding the Gold Skulltula. The fairy note will have changed as well. Visit as Adult Link without killing the Skulltula as a child, though, and the crate holds a Green Rupee instead.
Ganon's Castle - Ruined Gate
- Adult timeline
- Hookshot / Longshot required
Look on the side of the ruined gate closest to the Great Fairy Fountain. In the remake, you'll need the Hookshot or Longshot to get up there.
Kakariko Village - Impa's House Roof
- Adult timeline
- Night only
- Hookshot / Longshot required
Check the wall behind Impa's House, the one beside the chicken coop. Hookshot or Longshot onto the roof first, then hit the spider with your sword.
Kokiri Forest - Twin's House
- Adult timeline
- Night only
- Hookshot / Longshot required
It's on the left-hand spire of the Twin's House, near the tunnel that leads to the Great Deku Tree.
Lost Woods - Flying Plant
- Adult timeline
- Night only
- Magic Bean required
You remember the second soft soil spot in the Lost Woods? The one you reach by going right, left, right, left and left again from the Kokiri Forest entrance? Here's hoping you planted a Magic Bean there, because riding the flying plant as Adult Link takes you to a Gold Skulltula.
Sacred Grove – Wall
- Adult timeline
- Night only
- Hookshot / Longshot required
A Gold Skulltula clings to the wall above the maze area in the Sacred Grove.
Forest Temple – Entrance Room
- Adult timeline
- Hookshot / Longshot required
Look at the vines on your right as you enter the first room.
Forest Temple – Main Room
- Adult timeline
- Hookshot / Longshot required
Make for the northern door in the Forest Temple's main room — the one with four torches and an elevator. Partway up the stairs, turn around. The spider is on the floor to your left.
Forest Temple – West Garden
- Adult timeline
- Hookshot / Longshot required
One hangs high on the southern wall of the west garden. Can't spot it? Stand by the well, face south, then look up.
Forest Temple – East Garden
- Adult timeline
- Hookshot / Longshot and Scarecrow's Song required
After you push the block down to open a shortcut in the east garden, look up at the ledge above the doorway. Play the Scarecrow's Song and grapple onto the scarecrow with the Hookshot or Longshot. The Gold Skulltula waits on the floor. In the original game, it sits on the wall beside the chest instead.
Forest Temple – Room Before Boss
- Adult timeline
- Hookshot / Longshot required
In the room before Phantom Ganon, keep turning the central pillar until an alcove with a spider comes into reach.
Goron City – Sacred Stone Platform
- Adult Link
- Hookshot / Longshot required
It's on the back of the platform that once held the Sacred Stone of Fire — the small platform suspended in mid-air in Goron City. You can reach the spider either by standing on the ropes that lead to the platform or from the walkways that ring it.
Fire Temple – Near Long Bridge Room
- Adult Link
- Song of Time required
From the temple entrance, take the right-hand door into the room with the long bridge. On the left side of that room you'll find a Song of Time block.
Play the Song of Time and a new door appears. Climb on top of the block and go through. Destroy the flying tiles first, then grab the Gold Skulltula. A Like Like lurks in this room, but you can Hookshot past it and skip the fight.
Fire Temple – Maze Room
- Adult Link
- Bombs required
In the maze room with the rolling boulders, make for the second alcove in the top-right corner. Listen for the Skulltula's chittering to confirm the right spot. Once you've found the alcove, drop a Bomb to blow open the wall.
Fire Temple – Scarecrow, Maze Room
- Adult Link
- Scarecrow's Song and Hookshot / Longshot required
Start in the maze room. In the Remake, climb the block you pushed down after escaping the room where fire chases you. In the original, take the lower door on the northern side, then from the area you land in, enter the room with the wall of fire. Go through the door at the far end to get back to the maze room.
Now play the Scarecrow's Song. Get it right and the scarecrow appears — Hookshot or Longshot onto him. From the new ledge, jump across to the elevator. Go through the door and keep going until you reach a climbing frame.
In the Switch 2 Remake, climb to the top to reach the Gold Skulltula on the wall by the door. In the original, it's on the climbing frame itself.
Fire Temple – Scarecrow, Circular Room
- Adult Link
- Hookshot / Longshot required (Technically Scarecrow's Song too)
Do the steps in the section above first. The Gold Skulltula is on the brick wall in the next room, the circular one.
Fire Temple – Before Boss Key
- Adult Link
- Megaton Hammer required
You'll run into this Gold Skulltula on the way to the Fire Temple's Boss Key. The room it's in is impossible to miss, so just remember to grab it. In the Switch 2 Remake, you'll need the Megaton Hammer to break the grey rocks that hide it.
Death Mountain Trail – Road to Crater
- Adult timeline
- Night only
On the right-hand wall near the bottom of the climbable wall that leads to the upper entrance of Death Mountain Crater. In the Remake, smash the rocks concealing it with the Megaton Hammer.
Death Mountain Trail – Near Bomb Flowers
- Adult timeline
- Night only
- Megaton Hammer required
Go back to where you threw a Bomb Flower to open Dodongo Cavern. A rock there can be smashed with the Megaton Hammer, and at night a Gold Skulltula hides behind it.
Dodongo Cavern – Scarecrow, Larva Room
- Adult timeline
- Scarecrow's Song and Hookshot / Longshot required
This is the last Gold Skulltula in Dodongo Cavern. Return to the room with the Dodongo Larva on the right side of the main room. Roughly halfway along the hallway-like stretch, you'll see a ledge to your left. Play the Scarecrow's Song there, then Hookshot yourself up.
Zora River – On Wall
- Adult timeline
- Night only
- Hookshot / Longshot required
Climb the ladder about halfway along Zora River to reach the top of the hill. Jump over to the southern ledge and you'll find the Gold Skulltula on the wall.
Zora River – Near Waterfall
- Adult timeline
- Night only
- Longshot required
Just past the bridge that leads to the waterfall, a Gold Skulltula sits high on the left-hand wall. The Longshot makes easy work of it, but if you stand on the nearby fence, the Hookshot might just reach.
Zora Domain – Top Of Waterfall
- Adult timeline
- Night only
- Hookshot / Longshot required
Head to the top of the waterfall and look to your left.
Ice Cavern – Near Rotating Blade
- Adult timeline
- Hookshot / Longshot required
A Gold Skulltula waits in the room with the rotating blade.
Ice Cavern – Compass Room
- Adult timeline
- Hookshot / Longshot required
In the room with the Ice Cavern's Compass, check the back of the pillar on your right as you face away from the chest. In the original game, the Skulltula shares an alcove with the Heart Piece.
Ice Cavern – Moving Ice Blocks Room
- Adult timeline
- Hookshot / Longshot required
Enter the ice block room from the rotating blade room and check the wall directly to your left.
Lake Hylia – Laboratory
- Adult timeline
- Iron Boots, Hookshot / Longshot and Zora Tunic required
Put on the Iron Boots and sink to the bottom of the laboratory tank. Roll into the crate down there. You don't strictly need the Zora Tunic for this spider, but without it Link will come close to drowning.
Given how the Water Temple works, you may find these Gold Skulltulas easier to collect once you've finished it. That goes double if you're playing the original Ocarina.
Water Temple – Central Column Basement
- Adult timeline
- Iron Boots, Zora Tunic and Longshot required
Play the water-raising melody while standing inside the central column, then equip the Iron Boots and let yourself sink to the column's base. Down there you'll find a switch — hit it, then swim into the newly opened area. The Gold Skulltula clings to the wall beside the grate.
Water Temple - Bombable Wall Near Ruto Meeting Spot
- Adult timeline
- Bombs required
Raise the water to the middle level from inside the central column, then head back to the spot where you first met Princess Ruto. Surface and blow open the wall nearby with Bombs. The room behind it holds a few monsters — and the Gold Skulltula.
Water Temple - Underground River
- Adult timeline
- Iron Boots, Zora Tunic and Longshot required
The underground river opens up once you've beaten Dark Link and claimed the Longshot. Drop into the water and follow it until the second bend, where a Gold Skulltula waits on the wall. Equip the Iron Boots before you fire the Longshot.
Water Temple - Inside Center Column
- Adult timeline
- Longshot required
Save this one until you have the Longshot. Then drain the water with the first plaque you come across and step into the column in the central room. Inside, Longshot your way to the water level plaque and play Zelda's Lullaby.
Jump across to the doorway — but stay inside the column. Look up at the ceiling instead: there's a Longshot target up there. Zip to it, and the Gold Skulltula is within reach.
Water Temple - Right Before Boss Key
- Adult timeline
- Longshot required
On your way to the Boss Key you'll pass a small waterfall with boulders dropping from the ceiling. Wait for one to roll past, then stand in the waterfall. Look up along the boulder's path to find the spider. In the original game it sits on the back of the waterfall.
Lake Hylia - Big Tree
- Adult timeline
- Night only
- Longshot required
Make for the big tree in the middle of Lake Hylia and Longshot the vines at the top. Climb them to reach the Gold Skulltula sitting on the trunk. In the original game, you only need to Longshot the top of the trunk.
Hyrule Castle - Castle
- Child timeline
- Song of Storms, Bombs and Boomerang required
You may recall the lone tree standing near the crawlspace that leads into Hyrule Castle as Child Link. Come back once you know the Song of Storms and play it here to open a hole in the ground. Down in the grotto, bomb the left-hand wall near the back.
Death Mountain Crater - Soft Soil
- Child timeline
- Bottle of Bugs and Bolero of Fire required
Catch some bugs in an empty bottle first, then play the Bolero of Fire. Before the timer expires, empty the bugs into the soft soil beside the warp pad.
Bottom of the Well - Central Left-Hand Room
- Child timeline
- Small Key and Boomerang required
The central room of the Bottom of the Well isn't all it appears to be. Run through one of the walls in the middle and you'll find a hidden area with a hole and two locked rooms.
The one you want is on the left as you enter from the well's main entrance. Unlock it with a Small Key and step inside to claim the Gold Skulltula.
Bottom of the Well - Central Right-Hand Room
- Child timeline
- Lenses of Truth, Small Key and Boomerang required
This Gold Skulltula is in the room opposite the one above — the right-hand locked room in the well's central section.
Grab a Small Key, open the door, take out the Keese first, then switch on the Lenses of Truth. A hidden bridge runs around the corner of the room.
Bottom of the Well - Through Crawlspace Door
- Child timeline
- Lenses of Truth and Boomerang required
Find the crawlspace in the upper right corner of the central room. Go through it and then through the door — but stop right there. Turn on the Lenses of Truth to see the hidden holes in the floor. Deal with the Fire Keese too; they can knock you down a hole and into the basement without much effort.
With the fiery bats gone, take the door on the far side of the room. Watch out for the Beamos on the way. You're not clear yet — a Like Like waits on the other side. Kill it, and the Gold Skulltula is yours.
Shadow Temple - Hidden Scythe Room
- Adult timeline
- Lenses of Truth required
Work your way through the temple until you've beaten the Stalfos past the guillotines. Then use the Lenses of Truth to reveal platforms leading to a door on your left. Keep the Lenses on inside this room, or the spinning scythes will be invisible. The Gold Skulltula hides in a cell at the back. In the Switch 2 Remake, you'll need to go through the door past the Like Like to reach it.
Shadow Temple - Falling Spikes Room
- Adult timeline
- Lenses of Truth and Longshot required
Get to the falling spikes room and climb on top of the spike blocks. From there, use the block nearest the door to reach the Gold Skulltula in the top right corner.
Shadow Temple - End Of Wind Tunnel Room
- Adult timeline
Reach the end of the wind tunnel room and Longshot across the gap — but don't go any further. Turn around and look back at where you came from. The Gold Skulltula is on the wall below.
Shadow Temple - Before Getting On Boat
- Adult timeline
- Scarecrow's Song and Longshot required
Just before you board the completely ordinary, not-at-all spooky boat, play the Scarecrow's Song so the scarecrow appears on the platform across from you. Stand on the end of the boxes closest to that platform, Longshot the scarecrow, and cut the Gold Skulltula down.
Shadow Temple - Rotating Skull Room
- Adult timeline
- Longshot required
In the invisible maze room — the one you navigate to get the Boss Key — take the door opposite the one you entered by. You'll end up in a room with rotating skulls. In the Remake, blow up the skull to find the spider; in the original it's behind the skull.
Gerudo Valley - Behind Tent
- Adult timeline
- Night only
- Longshot required
Look behind the Carpenter's Tent.
Gerudo Valley - Pillar
- Adult timeline
- Night only
- Longshot required
Check the back of the pillar opposite the tent.
Gerudo Fortress - Wall
- Adult timeline
- Night only
- Longshot and Gerudo's Pass required
Make for the highest entrance to the Gerudo Fortress. Getting there means working through other sections of the fortress, and you'll want to leave via the upper left-hand exit from the kitchen area. The Gerudo's Pass makes the trip a lot easier.
The Gold Skulltula waits on the dirt wall just left of the entrance. It sits tucked into a small alcove, but you can still grab it without trouble.
Gerudo Fortress - Archery Range
- Adult timeline
- Night only
- Longshot and Gerudo's Pass required
At night, head to the target on the far left of the archery range.
Mirage Desert - Phantom Guide Building
- Adult timeline
Step inside the phantom guide building and check the space between the two torches.
Evil Desert Colossus - Right of Spirit Temple
- Child and Adult timeline
- Night only
- Longshot required
This one clings to the rockface on the right side of the Spirit Temple — the side without the Gossip Stone. Guay flock here, so clear them out first if you want to claim the token without interference.
Evil Desert Colossus - Soft Soil
- Child timeline
- Bottle of Bugs and Requiem of Spirit required
Fill an empty bottle with bugs one final time. Then play the Requiem of Spirit to reach the Spirit Temple and empty the bugs into the soft soil by the entrance. While you're there, plant a Magic Bean too.
Spirit Temple - Metal Fence Room
- Child timeline
- Boomerang required
Find the room with the metal fence and the Keese. The Gold Skulltula hangs on the right-hand side of the fence.
Spirit Temple - Next To The Giant Statue
- Child and Adult timeline
Make your way to the right side of the giant sand goddess statue. The Gold Skulltula is in the corner there.
Spirit Temple - Hallway Before Iron Knuckle
- Child and Adult timeline
- Boomerang required
Look above the lower doorway in the hallway that leads to the Iron Knuckle's room.
Evil Desert Colossus - Flying Plant
- Adult timeline
- Night only
- Have planted Magic Bean required
Come back to the Evil Desert Colossus once you've planted a Magic Bean. Ride the floating plant up to a small plateau, where the Gold Skulltula sits on the sand.
Spirit Temple - Boulder Room
- Adult timeline
- Song of Time required
From the Beamos area near the temple's entrance, take the right-hand door into the boulder room. The Gold Skulltula is in the alcove left of the door at the far end. Depending on how far you've gotten with the room's puzzle, you may need the Song of Time to shift the blue block before you can reach it.
Spirit Temple - Giant Statue Room
- Adult timeline
- Longshot and Scarecrow's Song required
In the giant statue room, go to the spot where you pushed the Armos statue onto a button as Child Link. Stand by the torch and play the Scarecrow's Song, then Longshot onto Pierre to reach the Gold Skulltula.
Zora Fountain - Silver Rock
- Adult timeline
- Night only
- Silver Gauntlets and Lenses of Truth required
The last Gold Skulltula brings you back to Zora Fountain. Head to the small patch of land by the entrance to the Great Fairy Fountain, where you'll find grey boulders you can move with the Silver Gauntlets. On the original version, you may also need Bombs to clear some ordinary boulders around the silver ones.
Once the boulders are gone, switch on the Lenses of Truth. That lets you see the invisible Big Skulltulas as you make your way through the newly opened tunnel. Eventually you'll hit some vines that need climbing. At the top, one last Big Skulltula waits — thankfully visible this time. From there you get a fine view of Zora Fountain.
Just remember to look behind you and up to spot the Gold Skulltula.
Gold Skulltula rewards
Every Gold Skulltula you collect brings you closer to the next reward. Just remember to visit the House of Skulltula in Kakariko Village to claim them.
Here's every reward and the number of tokens each one takes:
Reward Num. Gold Skulltula Tokens Adult Wallet Holds 500 Rupees 10 Echo Gem 20 Giant's Wallet Holds 1,000 Rupees 30 x20 Bombchu 40 Heart Piece 50 Unlimited Huge Rupee (200) 100Good luck tracking down every Gold Skulltula! If you need help with other collectibles, check out my Heart Piece locations, Big Poe locations and where to find the Empty Bottles.
Read this next
- Remakes and new games "both have a place in the stable" says Nintendo boss, buoyed by the success of Star Fox and Ocarina of Time
- The Legend of Zelda: Ocarina of Time's Navi actor reprises her role after 28 years, but it was a total accident due to Nintendo's blind auditions
- Nintendo tried adding fast travel to The Legend of Zelda: Ocarina of Time remake, before devs realised "we were missing out on the moments of discovery"
Source: eurogamer.net